DocsGetting started
Quick start
Your first working ticket panel in about five minutes: create it, pick who answers, write its messages, post it, then open and close a test ticket yourself.
In about five minutes you will have a panel in one of your channels, and you will have opened and closed a ticket from it yourself. Everything else can wait until this works.
#Before you start
- Sortr is in your server. If not, see Add Sortr to your server. If your server's page says "Sortr can't reach everything your panels use.", fix what it names first: see If something is out of reach.
- You are the server owner or have the Administrator permission.
- You have a role for your staff, such as Support or Moderators, and ideally a category for ticket channels. Sortr works with the roles and categories you already have.
#1. Create a panel
- Open the dashboard. Go to sortr.xyz/dashboard and press Continue with Discord to sign in with your Discord account (see Signing in).
- Open your server. Under Your servers, press Manage on its card.
- Create the panel. Under the Customize bot card, press Create the first panel, or New panel if the server already has some.
- Name it. Sortr asks for a name straight away, in a window called Name this panel. Type the name members should see, such as Support, and press Create panel. Nothing is created until you do: Cancel leaves the server as it was. The panel message uses this name as its title.
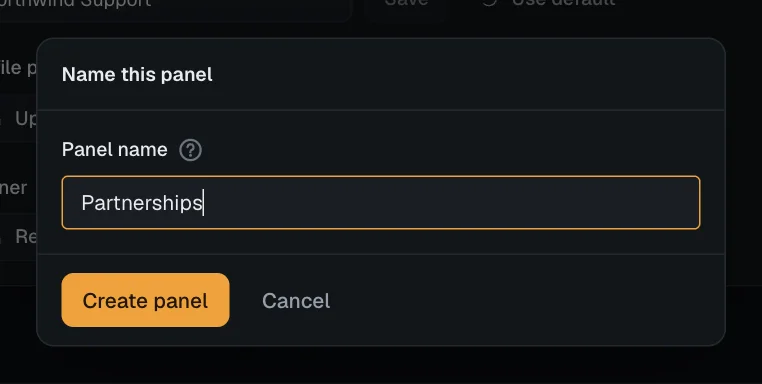
The panel's editor is now open on Panel message, with a menu of sections on the left. On a small screen the menu is a row across the top that scrolls sideways.
#2. Choose who answers
- Go to Who can see it. It is in the left menu under The ticket.
- Add your staff role. In Support team, press Add role and pick the role. Add more roles the same way if several teams answer.
Each role you add starts on Full access, with sensible permissions inside tickets. Leave those as they are for now. Without a support role, only the member who opened a ticket and your server's admins can see it.
#3. Choose where tickets go
- Go to Destination category. It is under The ticket too.
- Pick a category for new tickets. Under Where new tickets go, press Add a category and click the category you want. The list lets you mark several, numbered in the order you click them. Press Add 1 at the bottom of the list, or click outside it, to add what you marked. The numbers beside each category show how many of Discord's 50 channels per category are used.
- Optionally, pick one for closed tickets. Under Where closed tickets move, add a category the same way, so finished tickets are kept apart from open ones.
The category can be private, as long as Sortr's role is let into it with View Channel and Manage Channels: see Private categories.
#4. Adjust the message and button
- Go to Panel message. It is under What members see. Change the title and text if you like. The preview shows how it will look, and
{staff.roles}in the text becomes a mention of your support roles. - Go to Buttons. Under Ways to open a ticket there is one option, 🎫 Open ticket, which opens a ticket with this panel. Change its text, emoji or colour if you want to.
- Save. Press Save changes in the bar at the bottom of the page.
#5. Change the message inside the ticket
Every new ticket starts with an opening message from Sortr. It greets the member, mentions your support roles and carries the Close button. A new panel comes with a standard one, shown in step 7. To write your own:
- Go to Opening message. It is in the left menu under What members see, below Panel message.
- Change the text. The Message box is the plain line above the embed. It starts as
{user} {staff.roles}, which mentions the member and pings your support roles. Under it, change the embed's title and description the same way as on Panel message. Press a variable under a box, such as{user.name}or{ticket.number}, to add it to the text. - Check the preview. It shows the message as it will look inside a ticket, with the Close button under it.
- Save. Press Save changes. Tickets opened from then on get the new message. Tickets that are already open keep theirs.
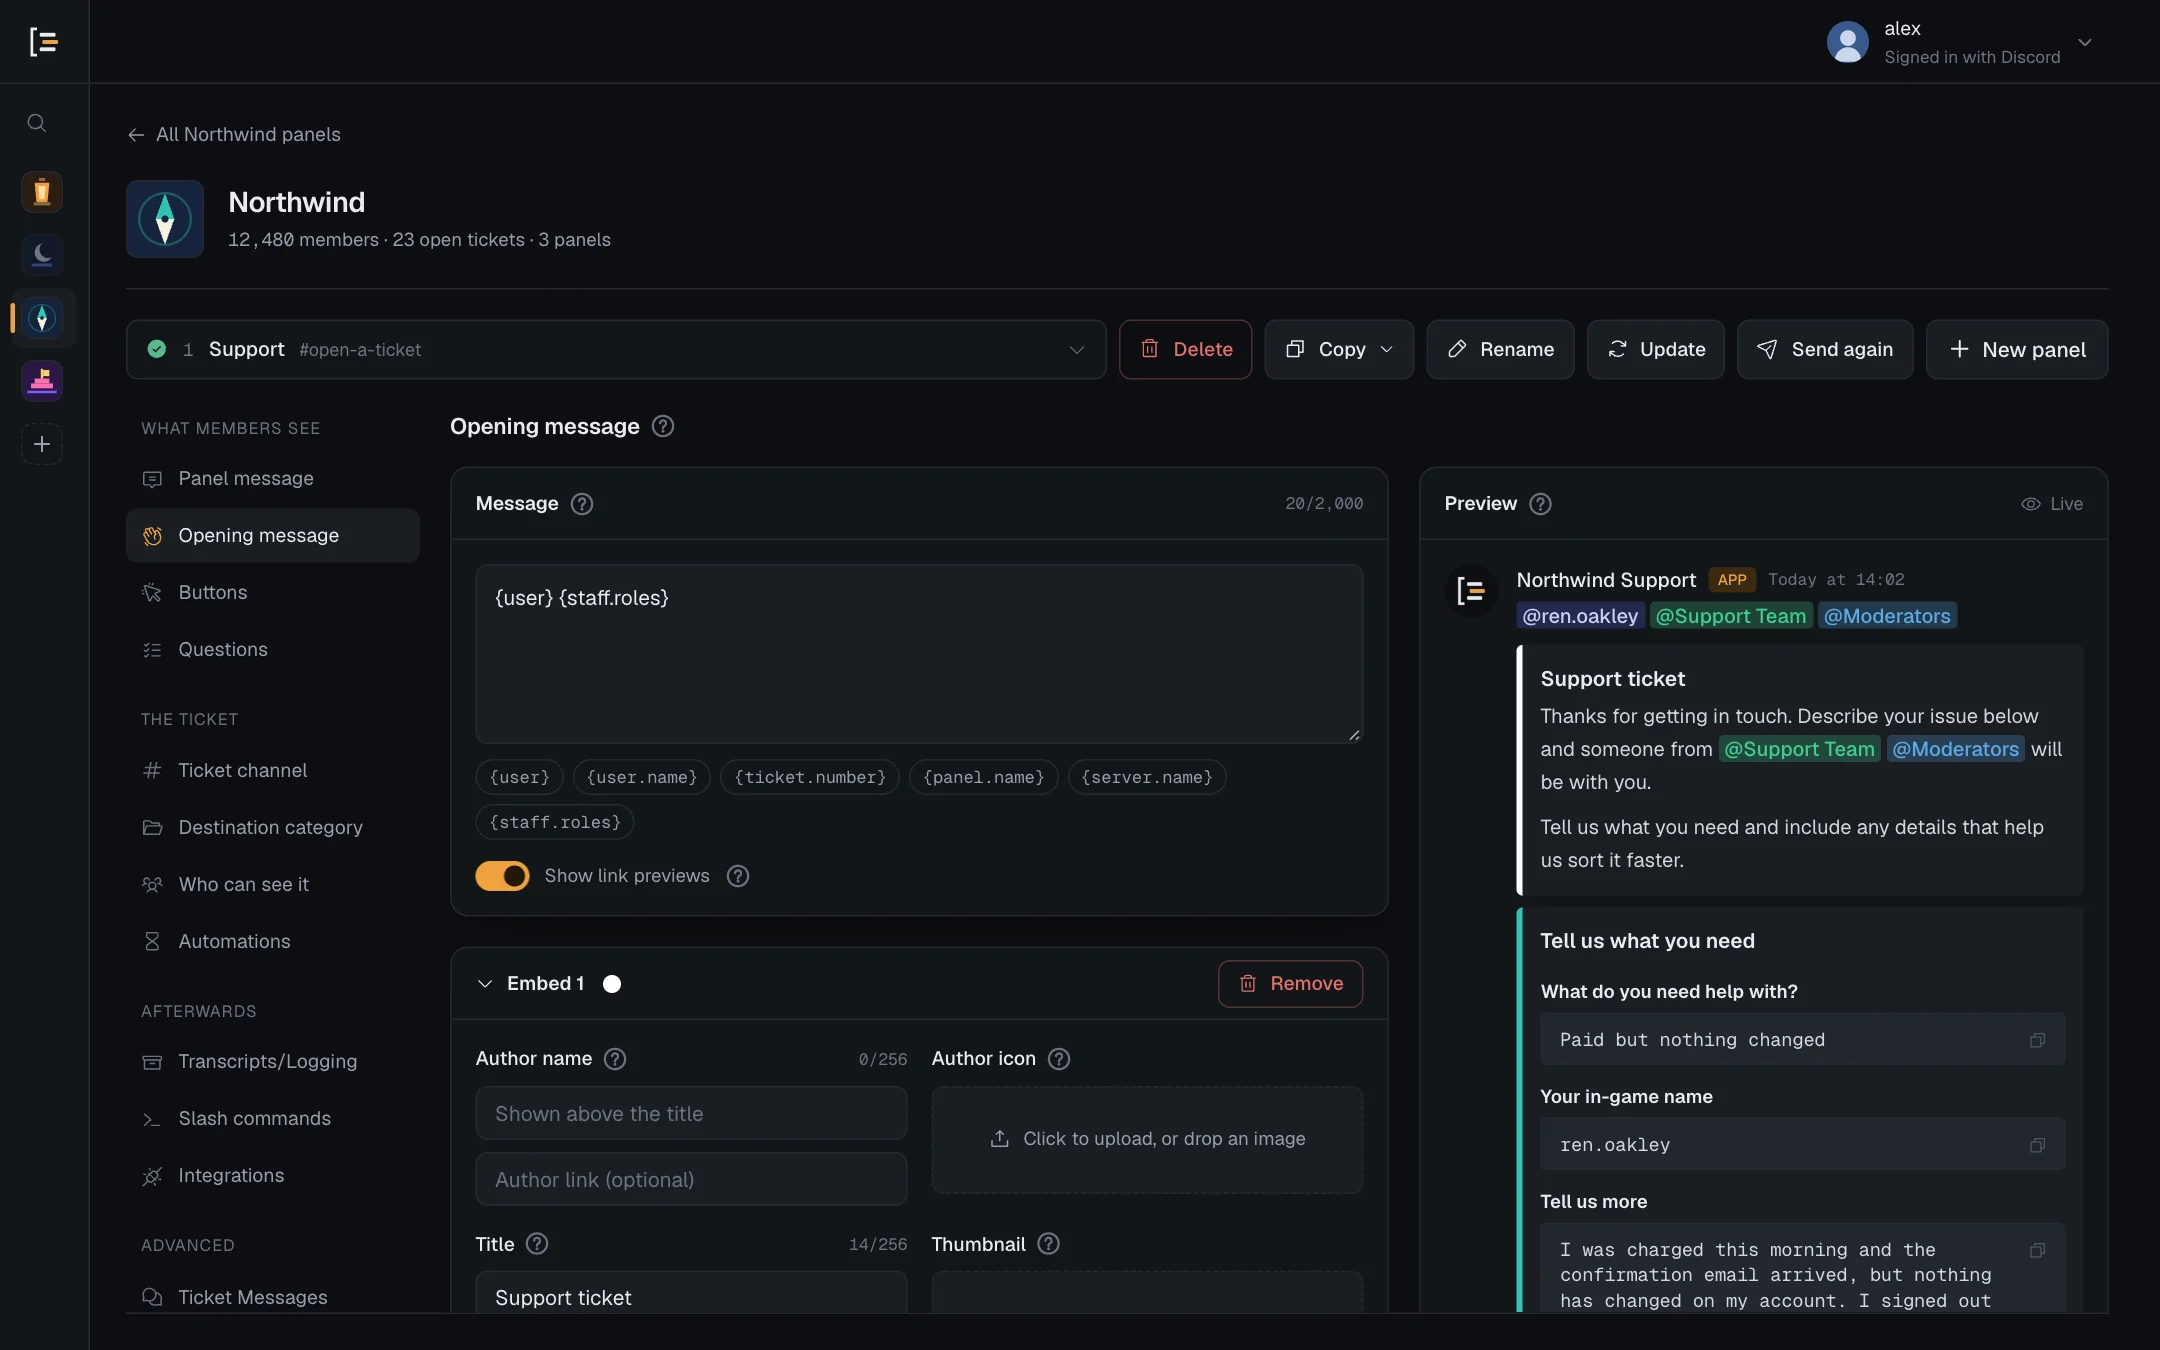
Keep {staff.roles} in the Message line if you want your staff pinged when a ticket opens: a mention inside an embed never pings anyone. Everything else about this message is on Opening message.
#6. Post it
- Press Send panel. It is on the panel row, beside the panel picker, above the menu of sections. If you still have unsaved changes it reads Save & send and saves them first.
- Pick the channel. A window called Send this panel opens, with no channel picked yet. Open the list under Channel. Your channels are grouped under their categories, and Find a channel at the top searches them by channel or category name.
- Send it. Press Send panel, which stays greyed out until a channel is picked. Under the panel row, the dashboard says "Posted. Members can open a ticket from the post in #channel.", with a link to the post. The panel picker now shows the channel beside the panel's name, and the button on the panel row reads Send again.
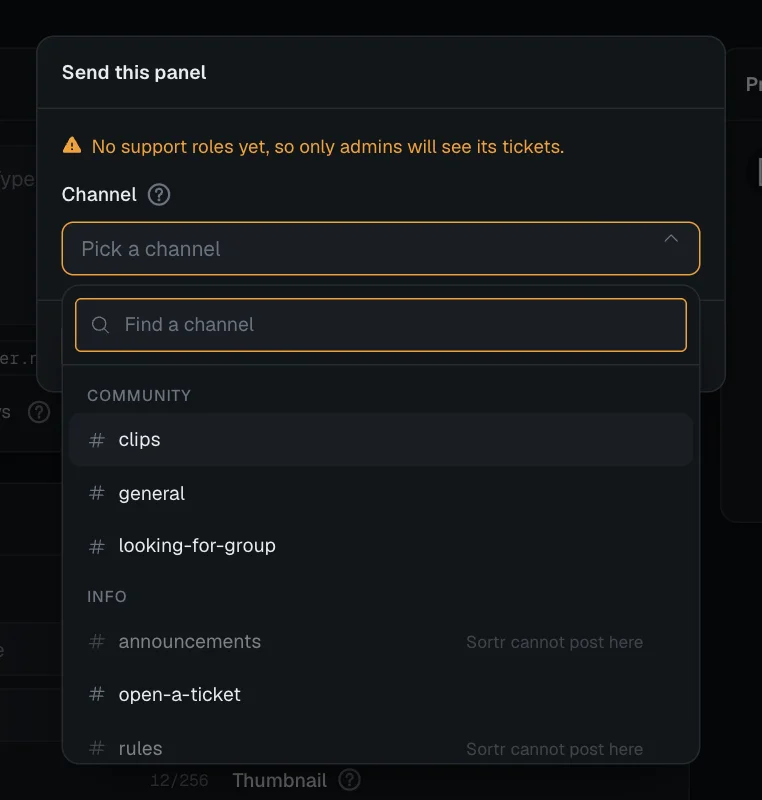
The send window warns you if the panel is still called New panel, or has no support roles yet. Neither stops you sending.
#7. Open a test ticket
- Press the button. In Discord, go to the channel and press Open ticket.
- Follow the link. Sortr answers with a message only you can see, such as "Ticket
0001opened:" and a link to the new channel. - Look around. The channel is named after the ticket number, such as
ticket-0001, and sits in your category. Sortr's opening message mentions you and your support roles, is pinned, and has a Close button. It is the message from step 5. More options are on Opening message.
#8. Close it
- Press Close. Sortr asks "Close this ticket?" in a message only you see. Press Close ticket.
- Watch what happens. Sortr posts "Ticket closed" with Reopen, Transcript and Delete buttons. With the settings a new panel starts with, it saves a transcript straight after. It renames the channel to
closed-followed by your Discord username, without its dots and with any underscore as a dash, and moves it to your closed category if you picked one. A member would lose access to the channel now. Bots keep their access. If Discord refuses Sortr in that channel, for example when its role lacks Manage Permissions there, taking the channel away can fail, and the event log then names who may still be in. You still see it because admins can see every channel in Discord. - Clean up. Press Delete. Sortr asks once, in a message only you see: "Deleting removes the channel and everything in it for good. Its transcript is already saved. Delete it? Dismiss this message to keep it." Press Delete ticket. Sortr posts "Deleting this ticket", which says the channel will be gone in 8 seconds, then removes the channel.
The transcript saved at the close is kept. You can read it in the panel's editor under Transcripts/Logging › Closed tickets. See Transcripts for saving it when the ticket is deleted instead.
Good to know. By default each member can have one open ticket per panel, and has to wait 5 minutes after opening one before opening another from the same panel. Opening a second test ticket straight away is refused with "You can open another ticket in" and the time left. Both are under Limits and rules.